Thor and Sprite Animations

Most of this week has for my part been taken up by getting the Thor library extension for SFML to work properly. Thor is made to provide options for 2D animation with SFML, allowing sprites to be animated. While it took quite some time to figure out, once I got it to work the process Thor uses is easy to replicate. Even so, installing the library was a confusing mess and the online instructions were more or less awful. In the end I got a copy of the correct files sent over by a classmate, which worked just fine after some fixing of missing files.

Once Thor was operational, began trying to figure out how to use it. As mentioned I found the online tutorial to be a confusing mess, so I had to ask around and do quite a bit of trial and error. What I could deduce online was two of the main functions of Thor: thor::Animator and thor::FrameAnimation.

thor::FrameAnimation Is used to put in frame, while thor::Animator puts those together and turns them into displayable animations. To do this you need a sprite sheet with the different frames of the animation for the functions to work with. The sprite sheet for our diver’s animations that I got from our art person looks like this:

spritedivera

Using thor’s functions, I then set up so that the Animator jumps between each of these frames in the correct order, which for arcane reasons is not the order they are displayed in. thor::Animator then makes sure to show the frames one by one, keeping the active one as the sprite of the player. Now let us see how the code is set up:

//Player.hpp

public:

thor::Animator <sf::Sprite, std::string> *getAnimator();
thor::FrameAnimation &getAnimation();

private:

thor::Animator<sf::Sprite, std::string>* m_animator;
thor::FrameAnimation swim;

As seen here I have given the player class two functions in public, which will be used to return the animator and the animation. Next there are two features in private which are used to create the animation itself. Now let us go over the the player.cpp file:

void Player::Initialize()
{
m_sprites[0].first->setOrigin(m_sprites[0].first->getLocalBounds().width * .5f, m_sprites[0].first->getLocalBounds().height * .5f);

thor::FrameAnimation swim;
m_animator = new thor::Animator<sf::Sprite, std::string>;
swim.addFrame(1.f, sf::IntRect(0, 0, 256, 256));
swim.addFrame(1.f, sf::IntRect(256, 0, 256, 256));
swim.addFrame(1.f, sf::IntRect(0, 256, 256, 256));
swim.addFrame(1.f, sf::IntRect(256, 256, 256, 256));
swim.addFrame(1.f, sf::IntRect(512, 0, 256, 256));
swim.addFrame(1.f, sf::IntRect(512, 256, 256, 256));
swim.addFrame(1.f, sf::IntRect(768, 0, 256, 256));
swim.addFrame(1.f, sf::IntRect(768, 256, 256, 256));
swim.addFrame(1.f, sf::IntRect(0, 512, 256, 256));
swim.addFrame(1.f, sf::IntRect(0, 768, 256, 256));

m_animator->addAnimation(”swim”, swim, sf::seconds(1.8f));
m_animator->playAnimation(”swim”, true);
m_animator->animate(*m_sprites[0].first);
}

First we make sure the sprite will be centralized using the setOrigin command. Once that is done we create the thor::FrameAnimation called swim. We also set up m_animator’s value for future use. Next we add the frames to swim one by one, using sf::intRect to decide which part of the sprite sheet each frame uses. We here have ten frames that uses each of the diver sprites in the sheet. The add animation function is then used to add all the frames into the animator and decide the numbers of seconds that the animation will take. We also declare the that it shall play the animation, and use Player’s main sprite to do so.

Next up we go to update, where we find the following:

m_animator->update(sf::seconds(deltatime));
m_animator->animate(*m_sprites[0].first);
m_sprites[0].first->setOrigin(m_sprites[0].first->getLocalBounds().width * .5f, m_sprites[0].first->getLocalBounds().height * .5f);

The first thing done by m_animator is that it takes into account the seconds passed according to update’s deltatime, and co-ordinates the animation after it. Then m_animator sees over the animation and updates the sprite if need be. Finally the sprite makes sure that the center of the current sprite is equal to origin. The final bit is more to solve possible issues before they happen, and might not be essential.

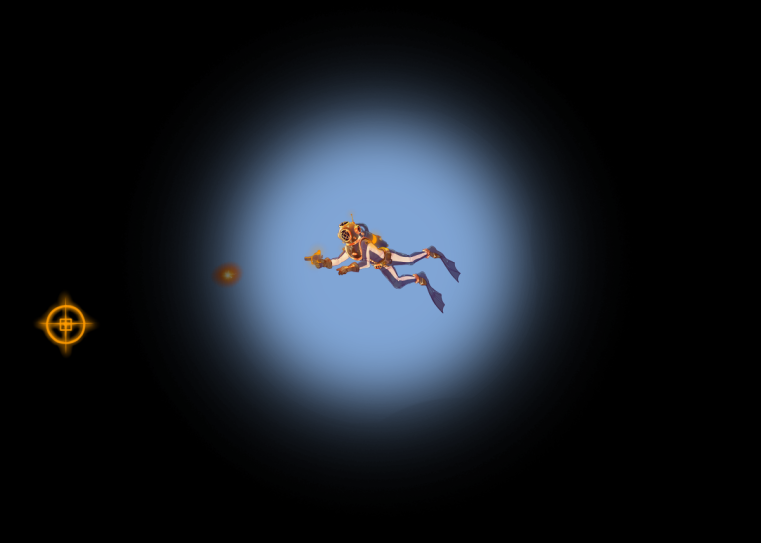
Based on this, we get the result of an animated sprite:

So to finish this up. While the results is what I wanted, the amount of work it took to install Thor and figure out how it works means that in the end I do not feel like it is worth recommending. If you desperately need a extension for animation Thor does work, but be prepared on that the installation will be a confusing and ill-explained process. Hopefully this read was not too tedious.

/Stefan

Where to find Thor: http://www.bromeon.ch/libraries/thor/

Ammunition Crates

This week has been a fair bit of work under the hood, preparing new things and setting up stuff for a later date. Given this there haven’t been much made to show. Thus this weeks post will talk about ammunition pick-ups.

As mentioned in the post about flares, our projectiles are limited due to the fact that having an endless amount would render the lack of light pointless. However, since it is a limited resource, refills can be an essential part of motivating the player to spend charges, and make sure they have access to flares at key points of maps.

For this reason we have the Ammunition crate, a simple item pick-up that gives more flares and allows the player to fire more projectiles. Let us continue this example with some pictures:

Blog Last-Flare-AmmoCrate

The last flare has been fired, leaving us without ammunition, but the glow from it has revealed a crate lying on the floor below us. The yellow color does hint that it is something useful, so we move closer.

Blog AmmoCrate-Pickup

As we move closer, the crate starts to lift, moving towards the avatar. As it reaches the avatar, it refills our ammunition, which will be more visible with the screen not cropped and the GUI fully operational.

Blog AmmoCrate-Flares

We are once again able to fire new flares, lighting up the path ahead for us. We are now once again able to use the flare, until we run out again.

As displayed this gives us a way to control the supplies of flares, and make it possible to resupply the player. If we notice the player running out of flares at specific points while testing a level, we can strategically place out crates to allow them to continue on. Let us have a look at some code:

if (distance < 100 && crate->GetExist() == true)
{
crate->SetDirection(atan2f(crate->GetY() – m_player->GetY(), crate->GetX() – m_player->GetX()) * 180 / PI);
}
if (distance < 10 && crate->GetExist() == true)
{
crate->SetExist(false);
m_flares = 5;
spickup.play();
}

This is very similar to the code used for power-ups and samples. The first checks the distance between player and the crate, and causes the crate to move towards the player, slightly faster than the player could swim away from. Once close enough to the player, the second part of the code triggers, removing the crate and setting the ammunition count to 5, the maximum. Whether or not the crates will always fully fill the projectiles or not is not set in stone and will have to be decided through testing.

So the crates allow us an easy way to resupply the player, and thus allow us to control the challenge and limitations a map provides, as well as design for moment when spending several flares would be okay. I hope this text has been somewhat helpful in explaining what we have been working on, and how this artifact helps my team in designing our game.

/Stefan

Flares!

This week one of my main artifacts was to get the Flares to work as intended. Since our game takes place in a mostly dark environment where visuals are valuable, flares plays a key-role in the game. The intent for the final product is to let the player use flare to light up areas and handle enemies. While flares are a limited resource they are a key piece of the game.

Blog Player-Flare-Crosshair

As seen, the game features a crosshair which is placed above the darkness, allowing aiming. The flares are meant to travel from the player, who is meant to be located in center of the screen, to the crosshair. After being fired the flare lasts ten seconds and only stops moving if it collides with a wall.

I worked for a long time trying to figure out a way to control the traveling path of the projectile, reading up online. In the end, the code for the projectile’s travel looked like this:

m_xAcc = cos(m_sprite->getRotation()*3.14159265 / 180); // Add an upper limit?
m_yAcc = sin(m_sprite->getRotation()*3.14159265 / 180);

m_x += m_xAcc * 5;
m_y += m_yAcc * 5;

m_sprite->setPosition(m_x, m_y);

The cos and sin code I took from an older project, for which I originally found it online. It sees to it so that the speed of the projectile is the same no matter the angle it. There is also a piece of code that rotates the flare towards the mouse when it spawns, which is then used by ”getRotation” to tell which angle the projectile is to travel in.

Once fired the flare flies on in the set direction unless it meets a wall. If it hits a wall it freezes and sticks there for the rest of it’s short existence. Ten seconds after the Flare is released it runs a removal function, causing the sprite to disappear.

With all of this added, the next step was to limit the flare count. Each click on the left mouse button spawned one flare, but it would remove the entire point of the darkness if there was not a limit to the amount of flares in the game. The limit is set to 5, with one being lost each time a flare is fired. In the final product more flares are intended to be possible to pick up.

The limit means the player has to be conservative and cannot just fire flares all over the place to remove the light issues. It also limits what the player will be able to do when it comes to handling enemies. This will be part of the game’s challenge and thus the access to flares will be a key part in balancing the game later on.

At the point of writing, the Flare sprite still does not have its last component added to it, the effect that allows to it to shine through darkness. This is a quick thing to add but since I was not the one to write the light code, I will have to ask about how to solve it.

The flares were a bother to get right, but their functionality for the game is key, and I learned a lot due to all the reading up I had to do just to figure out how to do it properly. There are likely fine-tuning to the flare’s speed and spawning mechanics that needs resolving, but for now it works and does what it is supposed to. Hope this was not too painful a read.

/Stefan